


This version is outdated by a newer approved version. This version (03 Sep 2018 07:47) was approved by Gowtham shanmugaraj.
This version (03 Sep 2018 07:47) was approved by Gowtham shanmugaraj.This is an old revision of the document!
Table of Contents
EV-COG-AD4050WZ with CrossCore Embedded Studio
There are no seperate toolchain,On-Board Peripheral Drivers & Software for EV-COG-AD4050WZ, the toolchain,On-Board Peripheral Drivers & Software for EV-COG-AD4050LZ works with EV-COG-AD4050WZ.The user needs to change only the pin muxing based on the application.For help regarding pinmapping refer to the Hardware Details section.
IDE Setup
- Install Cross Core Embedded Studio
- License Installation
- Start CCES and navigate to Help → Manage Licenses.
- Click New and enter the license key provided with the EV-COG-AD4050LZ box.
- Follow the on-screen instructions to register and activate the license.
Software Packs and Driver Setup
- Download the following packs for EV-COG-AD4050LZ
- Start CrossCore Embedded Studio.
- Go to CMSIS Pack Manager by navigating to Windows →Perspective →Open Perspective →Others → CMSIS Pack Manager.
- Click Import Existing Packs icon
 . Refer for more details.
 - Select all the packs and import. This will install the packs. Ignore the warnings seen on the console window. In order to remove these warnings, additional packs needs to be installed which are available in the last section of this page.
- Please refer to this link to download and install mbed serial driver on PC.
Running an Example Project
- Power the MCU Cog using a USB (micro-B) Cable. You should see a red LED and a yellow LED turn on by default.

- In CCES IDE, click CMSIS Pack Manager icon
 .
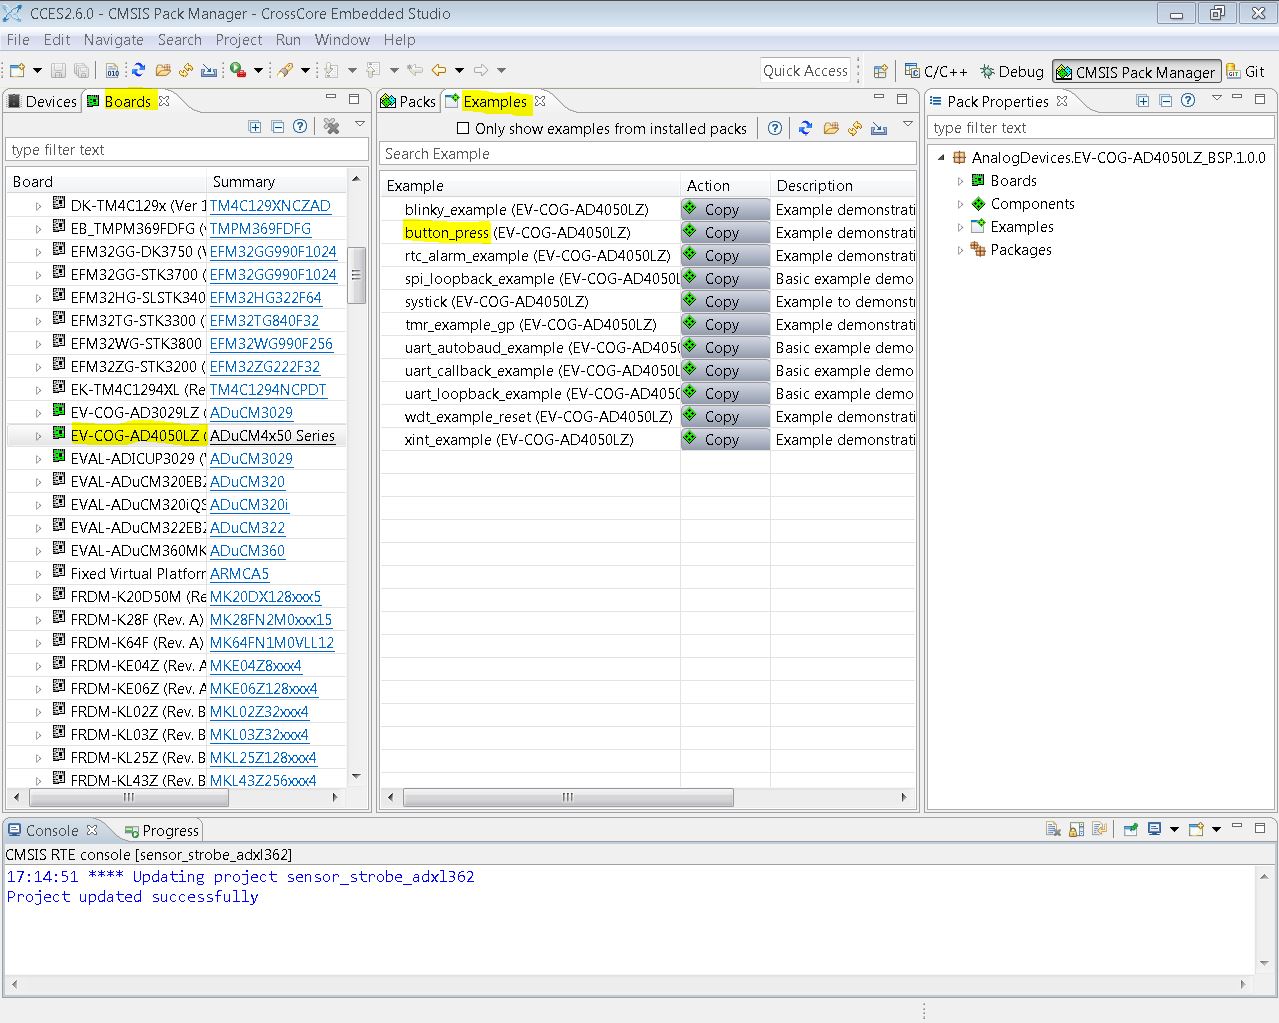
. - Select EV-COG-AD4050LZ from the Boards tab on the Left panel. (see below image)
- Copy button_press example from the Examples tab on the Right panel.
- Click C/C++ perspective icon

- Under Project Explorer select button_press example, click build icon
 .
. - Click on Debug icon
 once build is complete. Below are the Debug Configuration settings.
- Click “ok” on Perspective Switch and Semihosting Enabled window.


- Click run
 on the Debug perspective.
 - Now press BTN1 or BTN2 on EV-COG-AD4050LZ and inspect corresponding LED.
You are all set!
End Document
resources/eval/user-guides/ev-cog-ad4050w/quickstart_guide/cces.1535953664.txt.gz · Last modified: 03 Sep 2018 07:47 by Gowtham shanmugaraj