


This version is outdated by a newer approved version. This version (12 Mar 2018 05:08) was approved by Narsimh Kamath, Rohan Gurav.The Previously approved version (13 Feb 2018 08:43) is available.
This version (12 Mar 2018 05:08) was approved by Narsimh Kamath, Rohan Gurav.The Previously approved version (13 Feb 2018 08:43) is available.This is an old revision of the document!
Table of Contents
EV-COG-AD4050LZ with IAR Embedded Workbench for ARM
IDE Setup
- Install IAR Embedded Workbench for ARM
- Please visit https://www.iar.com/ to download IAR Embedded Workbench for ARM (version 8.20.1 or above).
- License Installation
- Make sure valid license is installed for the corresponding version.
Software Packs and Driver Setup
- Download the following packs for EV-COG-AD4050LZ
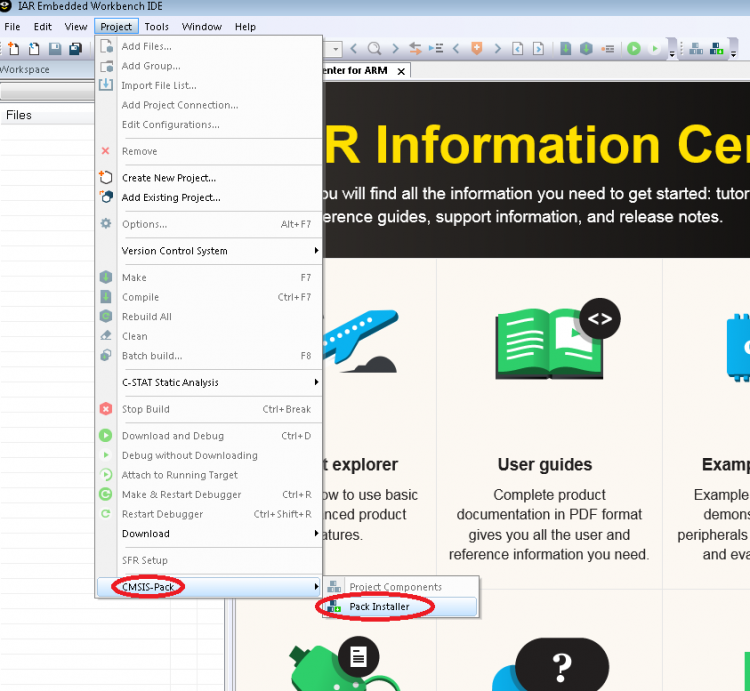
- Start IAR Embedded Workbench for ARM.
- Go to Project→ CMSIS-Pack→ Pack Installer.
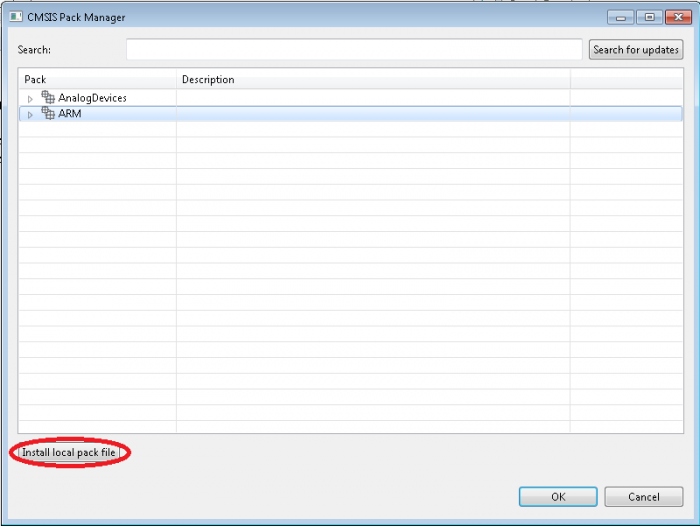
- In 'CMSIS Pack Manager' window, click 'Install local pack file'.
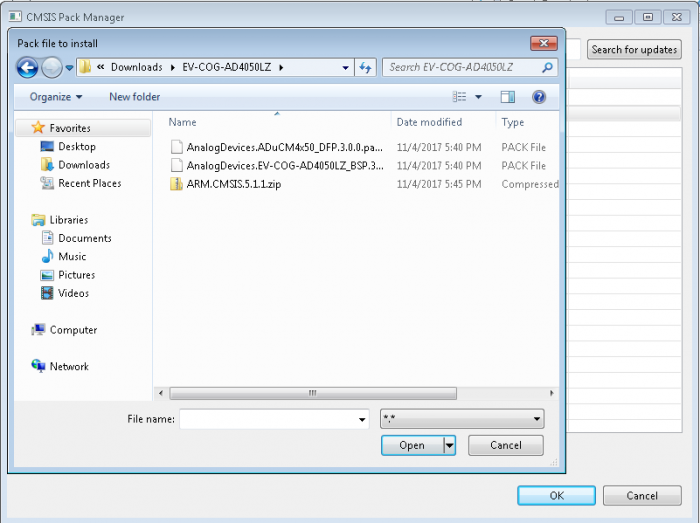
- In 'Pack file to install' window navigate to the downloaded pack (as already done in step 1 of this section), select all the packs to install and click Open.
Running an Example Project
- Power the MCU Cog using a USB (micro-B) Cable. You should see a red LED and a yellow LED turn on by default.

- In IAR IDE, go to Project→ Create New Project…

- In 'Create New Project' window, Select 'CMSIS Pack Example' and click 'OK'.

- Expand Analog Devices, select ADuCM4050 and click 'Next'.

- Select button_press example and click 'Finish'.

- Save the project to the desired location.
- Click on 'Debug and Download' icon
 on the menu bar. This will compile, build and download the project on EV-COG-AD4050LZ using CMSIS-DAP.
 - Click on 'Run' icon
 to start the debug session.
 - Now press BTN1 or BTN2 on EV-COG-AD4050LZ and inspect corresponding LED
You are all set!
End Document
resources/eval/user-guides/ev-cog-ad4050lz/quickstart_guide/iar.1520827709.txt.gz · Last modified: 12 Mar 2018 05:08 by Narsimh Kamath