This WIKI page will give a brief introduction to using a newly installed ACE application and how you can discover and download new ACE plug-ins, as well as connecting new hardware and recognizing installed/existing plug-ins.
You can return to the ACE WIKI Homepage here: ACE Homepage
ACE is designed to allow you to evaluate a product using the ACE plug-in, in a manner reflecting the associated hardware. When you first open ACE you will see the start screen shown in Fig. 1 below. ACE comes with a set of default plug-ins already installed that you should see in a displayed in a list on the start screen.
From the start screen you can choose a plug-in from the “Explore Without Hardware” list or the “Attached Hardware” list.
Explore Without Hardware
The “Explore Without Hardware” list is a full list of the plug-ins you currently have installed that can be launched in virtual mode to navigate through the plug-in views and hierarchy.
Attached Hardware
The attached hardware list will contain a single entry if you have no hardware physically attached to your machine “Manually Add Subsystem”. This entry allows users to configure their own “Attached Hardware Items” through the Serial Port settings tab and will be explained in more detail in a future WIKI article.
ACE relies on the plug-in being installed and hardware being connected appropriately for the product being evaluated, e.g. Connected via USB to your local machine. When you connect your hardware, the Attached Hardware list should be updated with a new item. The item's visible style helps to indicate whether there is a plug-in installed on your machine that can evaluate the attached hardware. See Fig. 2 below.
Installed plug-ins will have a bold title text, version number and contain an icon in the top right corner indicating the certification state of the plug-in. You can hover over the attached hardware item elements for more information.
If the plug-in for your hardware is installed, you can double click the item in the Attached Hardware list to add the product to the ACE System View as a new subsystem.
Plug-in Manager Installation
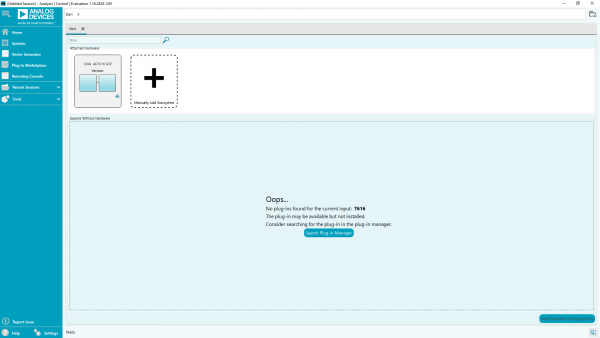
Before continuing with the attached hardware example and explaining what a subsystem is, there are a number of ways that you can search for and install new ACE plug-ins. The easiest way is to search in the ACE application itself. You can start typing the plug-in ID into the search bar and if no matching ID is found in the installed plug-ins list ACE will prompt you to search for the plug-in using the in-app marketplace/plug-in manager, see Fig. 3. below:

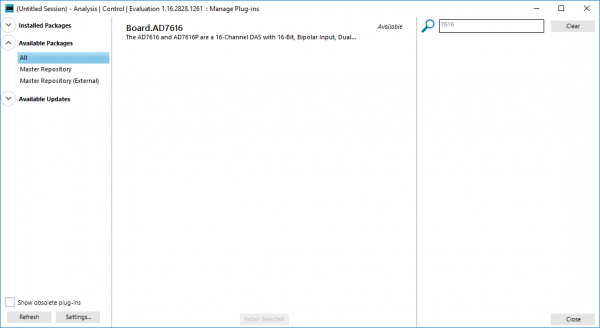
Clicking the button in the on-screen prompt will launch the plug-in manager with the current search string already included and the “Available Plug-ins” tab selected by default. If the plug-in search string matches an available plug-in from the ACE repository you can select it from the list and choose the “Install Selected” option. See Fig. 4 below:

When you close the dialog window you should now see the visual state of your hardware item has changed to reflect the newly discovered plug-in. If you don't have hardware attached, your new plug-in should also be available in the “Explore Without Hardware” section.
ACEZIP Installation
ACE also allows plug-in installation from a special file type called an ACEZIP. Plug-ins are often packaged as ACEZIP files and made available through the analog.com website. You can find them in a list on the main ACE Software Homepage or on the product evaluation page of the specific product being evaluated.
To install from an ACEZIP file, simply download the file and double click on it. The only prerequisite for the installation is that you have ACE installed. ACEZIP files have a special association with the ACE application. Once you execute the ACEZIP file, it will install the plug-in packaged within it and also launch a new instance of the ACE application so you can quickly get up and running with your new software.