


This version (26 Sep 2017 08:41) was approved by Pranit Jadhav.The Previously approved version (21 Sep 2017 06:52) is available.
Table of Contents
Driver Installation for On-board Debugger (CMSIS DAP)
The MCU Cog has an on-board debugger which supports the ARM CMSIS DAP interface. When connecting up the EV-COG-AD4050LZ to your computer or laptop, all the necessary drivers are automatically located and loaded up when using Windows operating systems.
There are two sets of drivers that get installed on your computer depending on which mode of operation the EV-COG-AD4050LZ emulator comes up.
It EXTREMELY important to ensure that all drivers are installed, before trying to use the EV-COG-AD4050LZ with the CrossCore Embedded Tools. So when you see that the drivers are being installed in the task bar, open it up and wait till everything finished before progressing.


Mass Storage Drives
DAPLINK Drive
When the EV-COG-AD4050LZ emulator is connected to the ADuCM4050 and ready for program/debug mode, the “DAPLINK” drive is displayed on your computer.
This mode allows users to drag and drop (or copy and paste) a .BIN or .HEX [Intel formatted] file directly into the DAPLINK drive, and that file will be flashed directly to the ADuCM4050. This means you don't have to use the tools or the debugger to program your board, making this very useful in production releases or updating applications already in the field.
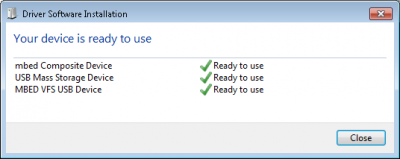
- The PC will start searching for and install the following drivers:(if not already complete)

- Then go to the My Computer view and search for the DAPLINK drive, if you see this then the drivers are complete and correct.

- After that simply drag and drop (or copy and paste) your .BIN or .HEX [Intel formatted] file to the DAPLINK drive, and your EV-COG-AD4050LZ board will be programmed.
- Your Windows Explorer browser will close automatically
- You will need to press the RST button in order for the program to update
- Alternatively you could unplug the micro USB cable from the USB port (P5) of the EV-COG-AD4050LZ, and then reconnect it.


Maintenance Drive
When the EV-COG-AD4050LZ emulator is connected to the MK20DX128VFM5 (by holding down the “RST” button while connecting the USB port (P5) to the PC/laptop) the “Maintenance” drive is displayed on your computer. This mode allows a user to overwrite the ADuCM4050 interface file within the emulator. This allows for patches and updates to the firmware on the emulator.
- The PC will start searching for and install the following drivers:(if not already complete)
- Then go to the My Computer view and search for the Maintenance drive, if you see this then the drivers are complete and correct.

- After that simply drag and drop (or copy and paste) the latest interface file to the Maintenance drive, and your EV-COG-AD4050LZ board will be updated with the latest interface file.
- Your Windows Explorer browser will close automatically
- Unplug the micro USB cable from the USB port of the EV-COG-AD4050LZ, and then reconnect the USB cable to the USB port to “reboot” the board.


EV-COG-AD4050LZ Interface File Downloads
The current EV-COG-AD4050LZ interface file can be downloaded here:
EV-COG-AD4050LZ Interface File
- Initial version of mbed firmware for interfacing ADuCM4050 on EV-COG-AD4050LZ.
End of Document
resources/eval/user-guides/ev-cog-ad4050lz/tools/hardware_usb.txt · Last modified: 26 Sep 2017 08:40 by Pranit Jadhav