


This version (23 Apr 2025 06:31) was approved by Pranjali Agrawal.The Previously approved version (17 Nov 2023 11:30) is available.
Table of Contents
AD7192 Evaluation Board User Guide
The EVAL-AD7192ASDZ evaluation kit features the AD7192 which is 4.8 kHz ultralow noise 24-bit sigma-delta (Σ-Δ) ADCs.The on-chip low noise gain stage means that signals of small amplitude can interface directly to the ADC.The internal clock option provides a compact solution for low BW requirements.
The AD7192 ACE Plugin fully configures the AD7192 device register functionality and provides dc time domain analysis in the form of waveform graphs, histograms, and associated noise analysis for ADC performance evaluation.
Full specifications on the AD7192 are available in the product data sheet, which should be consulted in conjunction with this user guide when working with the evaluation board.

Features
- Full featured evaluation board for the AD7192
- PC control in conjunction with the system demonstration platform (EVAL-SDP-CB1Z/EVAL-SDP-CK1Z)
- PC software for control and data analysis (time and frequency domain)
Related Documents
Required Software
Quick Start Guide
The following steps highlight the process to begin using the evaluation board.
Equipment Required
- PC running Windows with a USB2.0 port and software installed.
- Controller Board
- Option A: EVAL-SDP-CK1Z and a USB-C cable
- Option B: EVAL-SDP-CB1Z and a Micro-USB cable
Getting started
Ensure the SDP board is not connected to the USB port of the PC
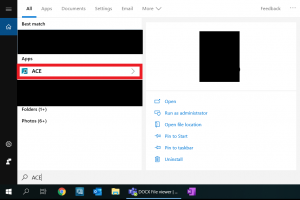
- Install the ACE Software
- If ACE Software is already installed, update the Plugins to download AD719x Plugin.
- Connect the EVAL-AD7192ASDZ to the controller board
- Option A: Connect the EVAL-AD7192ASDZ to the EVAL-SDP-CK1Z
- Using the 120 pin connector
- Screw the two boards together using the plastic screw-washer set included in the evaluation board kit to ensure that the boards are connected firmly together.
- Using the Arduino Connectors

- Option B: Connect the EVAL-AD7192ASDZ to the EVAL-SDP-CB1Z
- Using the 120 pin connector
- Screw the two boards together using the plastic screw-washer set included in the evaluation board kit to ensure that the boards are connected firmly together.
- If using Windows® XP, it may be needed to search for the controller board drivers. Choose to automatically search for the drivers for the controller board if prompted by the operating system.
- Launch the ACE plugin from the Analog Devices subfolder in the Programs Menu.
- The Low Noise Test Demo is a useful demo mode of the Ace Plugin software to ensure that the Evaluation board is communicating correctly with the Ace Plugin software.


Hardware Guide
Visit the hardware guide chapter here
Contents of the Hardware guide:
Software Guide
Visit the software guide chapter here
Contents of the Hardware guide:
-
-
- Weigh Scale Demo
resources/eval/user-guides/ad7192.txt · Last modified: 23 Apr 2025 06:31 by Pranjali Agrawal