This section presents the steps for developing a software application that will run on the Renesas Demo Kit for RX62N for controlling and monitoring the operation of the ADI part.
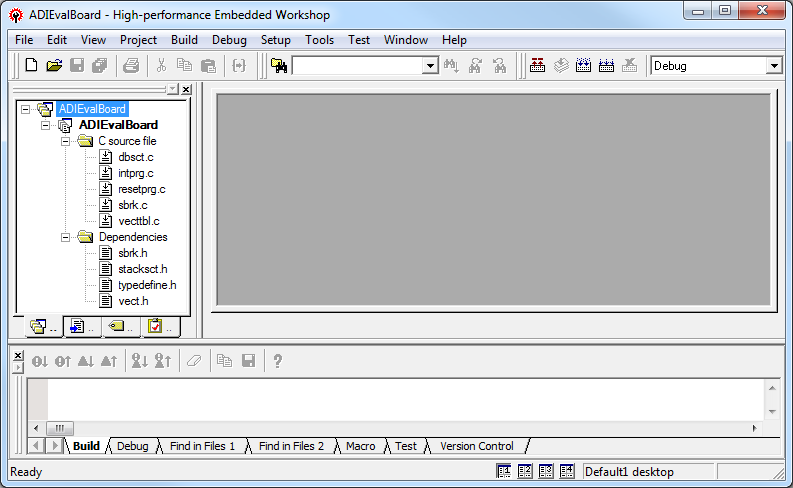
Run the High-performance Embedded Workshop integrated development environment.
A window will appear asking to create or open project workspace. Choose “Create a new project workspace” option and press OK.
From “Project Types” option select “Application”, name the Workspace and the Project “ADIEvalBoard”, select the “RX” CPU family and “Renesas RX Standard” tool chain. Press OK.


The RPDL (Renesas Peripheral Driver Library) has to integrated in the project. Unzip the RPDL files (double-click on the file “RPDL_RX62N.exe”). Navigate to where the RPDL files were unpacked and double-click on the “Copy_RPDL_RX62N.bat” to start the copy process. Choose the LQFP package, type the full path where the project was created and after the files were copied, press any key to close the window.
The new source files have to be included in the project. Use the key sequence Alt, P, A to open the “Add files to project ‘ADIEvalBoard’” window. Double click on the RPDL folder. From the “Files of type” drop-down list, select “C source file (*.C)”. Select all of the files and press Add.

To avoid conflicts with standard project files remove the files “intprg.c” and “vecttbl.c” which are included in the project. Use the key sequence Alt, P, R to open the “Remove Project Files” window. Select the files, click on Remove and press OK.

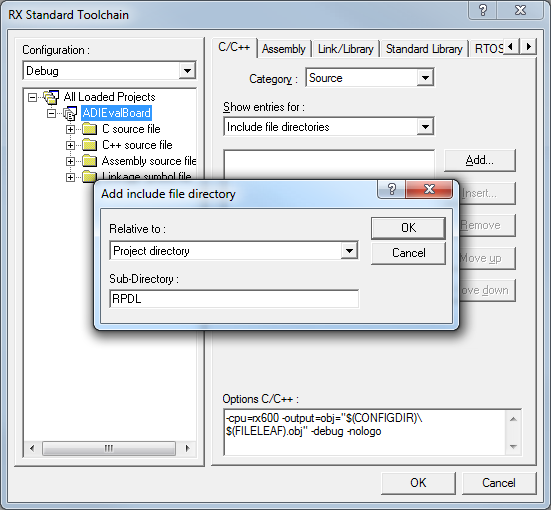
Next the new directory has to be included in the project. Use the key sequence Alt, B, R to open the “RX Standard Toolchain” window. Select the C/C++ tab, select “Show entries for: Include file directories” and press Add. Select “Relative to: Project directory”, type “RPDL” as sub-directory and press OK.

The library file path has to be added in the project. Select the Link/Library tab, select “Show entries for: Library files” and press Add. Select “Relative to: Project directory”, type “RPDL\RX62N_library” as file path and press OK.

Because the “intprg.c” file was removed the “PIntPrg” specified in option “start” has to be removed. Change “Category” to “Section”. Press “Edit”, select “PIntPRG” and press “Remove”. From this window the address of each section can be also modified. After all the changes are made press OK two times.


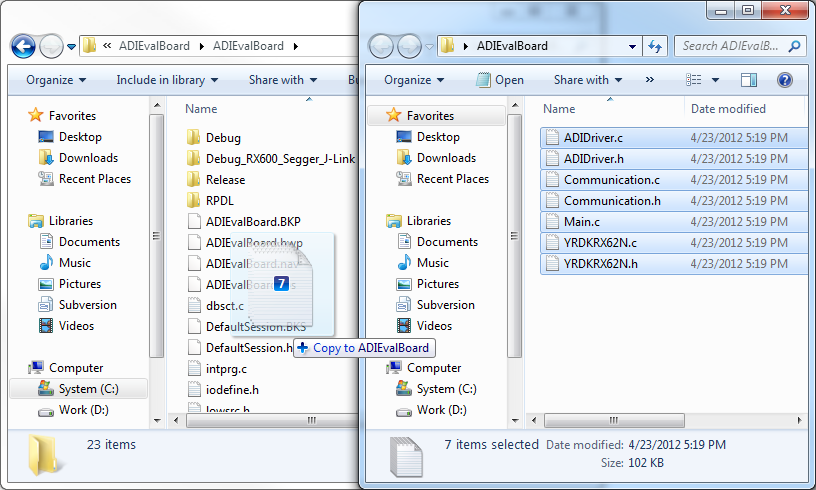
Now, the files have to be included in the project. Use the key sequence
Alt, P, A to open the “
Add files to project ‘ADIEvalBoard’” window. Navigate into
ADI folder. From the “
Files of type” drop-down list, select “
Project Files”. Select all the copied files and press
Add.

Now, the project is ready to be built. Press F7. The message after the Build Process is finished has to be “0 Errors, 0 Warnings”. To run the program on the board, you have to download the firmware into the microprocessor’s memory.
