


This version is outdated by a newer approved version. This version (03 Jan 2013 17:00) was approved by Robin Getz.The Previously approved version (06 Aug 2012 10:14) is available.
This version (03 Jan 2013 17:00) was approved by Robin Getz.The Previously approved version (06 Aug 2012 10:14) is available.This is an old revision of the document!
Table of Contents
SigmaStudio Network Utility for Linux
The SigmaStudio Network Utility for Linux is a tool for the Linux operating system, which allows SigmaStudio to connect to a audio CODEC/DSP via a TCP connection. This allows to use SigmaStudio for in-system testing or rapid prototyping.
Download the SigmaStudio Network Utility
The source code for the SigmaStudio Network Utility can be downloaded from the wiki.
Build and install the SigmaStudio Network Utility
Download the SigmaStudio Network Utility and extract the tar archive. To build the tool run make.
This specifies any shell prompt running on the target
> wget http://wiki.analog.com/_media/resources/tools-software/linux-software/sigma_tcp.tar.bz2
> tar -xjf sigma_tcp.tar.bz
> cd sigma_tcp
> make
Run
To run sigma_tcp on the target system just execute `sigma_tcp`. sigma_tcp supports different modes. The mode is selected by the first argument passed to the sigma_tcp executable. Each mode has a number of mode specific additional arguments. If no mode is specified sigma_tcp will use the debug mode by default.
Example:
This specifies any shell prompt running on the target
> sigmap_tcp debug
Using debug backend
Waiting for connections...
IP addresses:
eth0: 192.168.0.123
After sigma_tcp has been started it will print “Waiting for connections…” and the list of IP addresses it is listening on. You will need the IP address when opening up a connection from SigmaStudio. After a new connection has been established sigma_tcp will print “New connection from <ip>”, where <ip> is the IP of the client system. When the client disconnects sigma_tcp will print “Connection closed.”.
sigma_tcp only allows one client connection at a time. It is not possible to connect multiple SigmaStudio instances at the same time.
Debug mode
In debug mode all register writes go to an internal cache and all register reads will return the values from this cache. So no actual hardware access is done in this case. This mode is useful to test the basic functionality of sigma_tcp. In debug mode each read and each write performed by SigmaStudio will be logged on the console.
Example
> sigmap_tcp debug
Using debug backend
Waiting for connections...
IP addresses:
eth0: 192.168.0.123
Regmap mode
In regmap mode sigma_tcp expects the path to a regmap debugfs file, which will be used to read the registers. In this mode it is only possible to read the devices core registers. It is not possible to read any other registers or to write any registers.
Example
> sigma_tcp regmap /sys/kernel/debug/regmap/0-003b/registers
Using regmap backend
Waiting for connections...
IP addresses:
eth0: 192.168.0.123
Regmap mode required debugfs support to be built into the kernel.
In `make menuconfig`:
  Kernel hacking  --->
    ...
    [*] Debug Filesystem
    ...
In .config:
CONFIG_DEBUG_FS=y
I2C mode
The third mode is the “i2c” mode. In I2C mode sigma_tcp uses raw access to the I2C bus. In this mode it is possible to read and write all register and it is possible to download and configure a DSP firmware.
The I2C mode takes two parameters, the first parameter is the I2C adapter character device (e.g. “/dev/i2c-0”). The second parameter is the address of the I2C device (e.g. “0x3b”).
This specifies any shell prompt running on the target
> sigma_tcp i2c /dev/i2c-0 0x3b
Using i2c backend
Waiting for connections...
IP addresses:
eth0: 192.168.0.123
Writing core CODEC registers in this mode may confuse the Linux driver since its internal
and the external state do not necessarily match anymore.
I2C mode requires support for the I2C device interface built into the kernel.
In `make menuconfig`:
  Device Drivers  --->
    -*- I2C support  --->
       ...
       <*>   I2C device interface
       ...
In .config:
CONFIG_I2C_CHARDEV=y
On the host system
Lunch SigmaStudio. Add the TCPIPADAU1761 and the ADAU176x modules to the “Hardware Configuration” window and connect both modules.
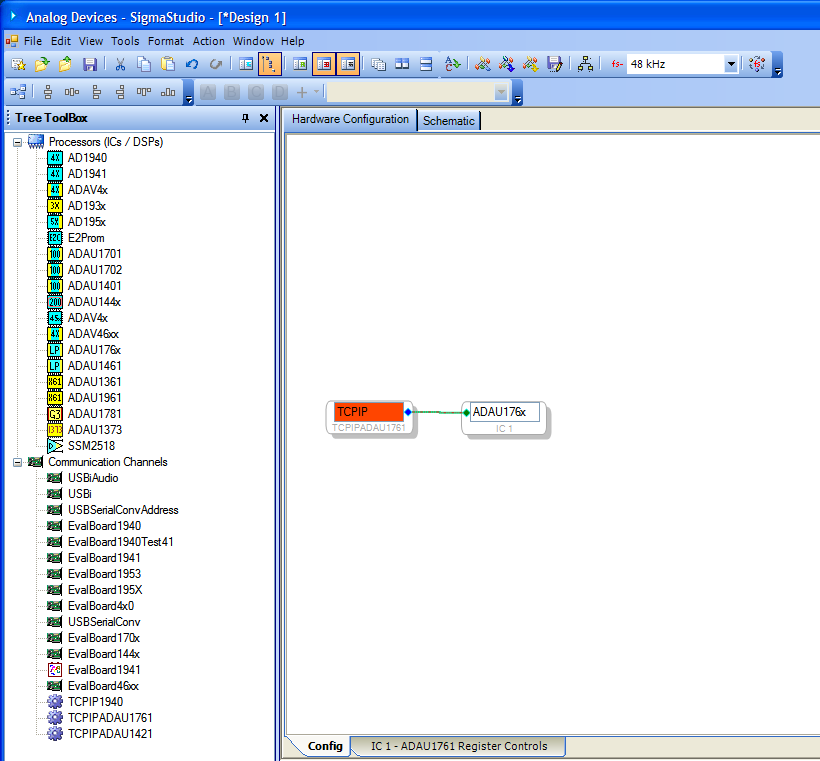
Now right click on the TCPIPADAU1761 module and select “Show TCPIP Settings” from the popup menu.

This brings up the configuration dialog. Enter the target IP address in the dialog and click “Open Connection”.

You can now switch to the ADAU1761 configuration window and read and write (depending on the sigma_tcp mode) register settings from the device. If the sigma_tcp is running in I2C mode it is also possible to download a firmware by clicking the “Link Compile Download” button.
More information
resources/tools-software/linux-software/sigmatcp.1357228841.txt.gz · Last modified: 03 Jan 2013 17:00 by Robin Getz