


This version is outdated by a newer approved version. This version (06 Jun 2023 17:51) was approved by Harshvardhan Bhatia.The Previously approved version (07 Dec 2022 17:04) is available.
This version (06 Jun 2023 17:51) was approved by Harshvardhan Bhatia.The Previously approved version (07 Dec 2022 17:04) is available.This is an old revision of the document!
Table of Contents
ADIToFGUI
This is a guide for the ToF module viewer. This page applies to the viewer for the following modules:
Start
- Find the ADIToFGUI.exe in the 'viewer' or 'bin' folder located at the install location
- v2.x.x
- Default location : C:\Analog Devices\TOF_Evaluation_BM-RelX.X.X\viewer\
- v3.x.x
- Default location : C:\Analog Devices\TOF_Evaluation_BM-RelX.X.X\bin\
- If you are evaluating the EVAL-ADTF3175D-NXZ:
- Confirm that an unidentified local network has been discovered by the pc - IP address = 10.42.0.1
- Run TOF_Evaluation_BM-Rel3.x.x
- Hit refresh until a Device is found
- Select .json file based on your kits serial number
- If your serial number starts with 'DV11' or 'CR' select tof-viewer_config.json
- If your serial number starts with 'am' select tof-crosby-new.json
- If you are evaluating the following modules : EVAL-ADTF3175-NXZ or EVAL-ADSD3100-NXZ
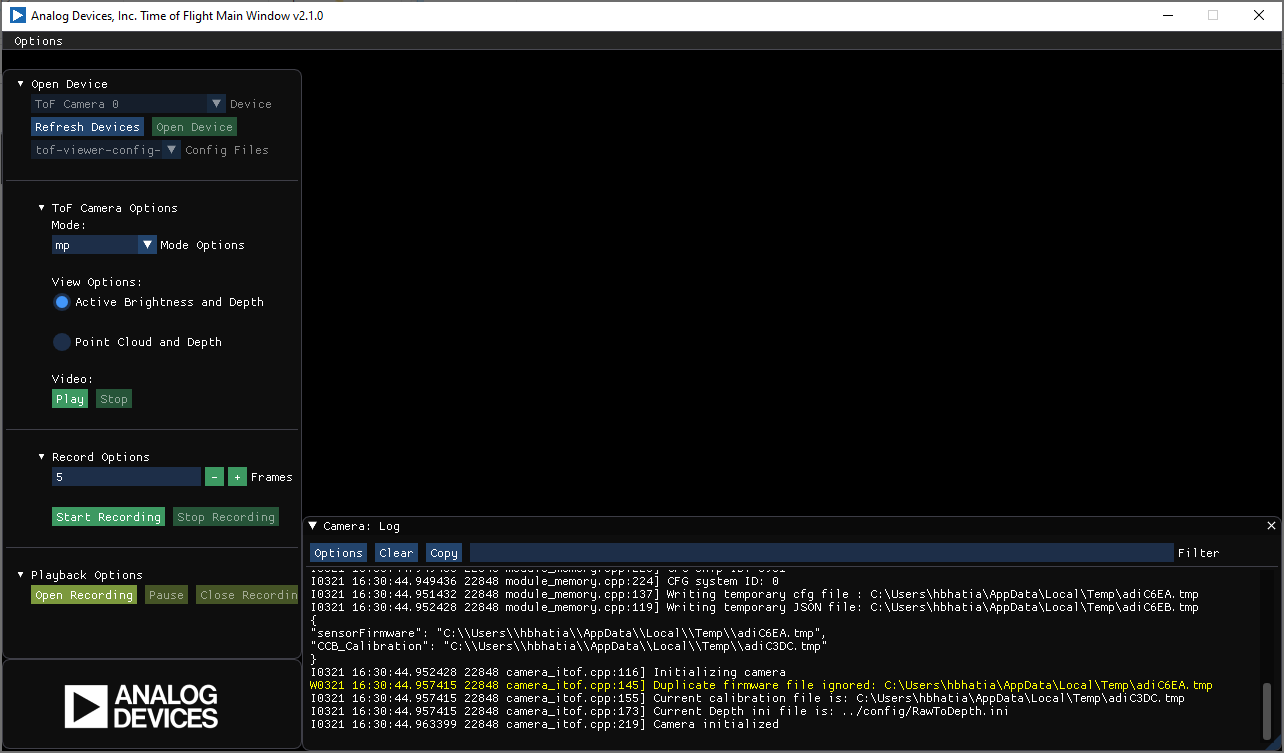
- Start the viewer to get to the window below
- If a camera is connected it should show up in the 'Device' drop down menu
- Select your device
- Select correct config file (depends on which module you are using)
- EVAL-ADTF3175-NXZ : tof-viewer-config-adtf3175.json
- EVAL-ADSD3100-NXZ : tof-viewer-config-adsd3100.json
- Click 'Open Device'

Run Camera
- Once the device has been initialized the 'ToF Camera Options' menu should be available
- Available modes will depend on the module
- EVAL-ADTF3175-NXZ : mp, qmp
- EVAL-ADSD3100-NXZ : mp, qmp
- EVAL-ADTF3175D-NXZ : mp, qmp
- Select preferred view option (described below) and click play to run camera
If the user disconnects the camera via USB-C cable while the GUI has initialized the camera. The user must restart the GUI
Active Brightness and Depth
- If this option is selected, the first window will show active brightness/intensity, while the second window will show depth
- Depth is shown in mm, the user can hover over the image to see real-time depth data

Mode Switching
- If the user wants to switch modes while the camera is running frames:
- Click 'Stop'
- Select mode in drop down menu
- Click 'Play'
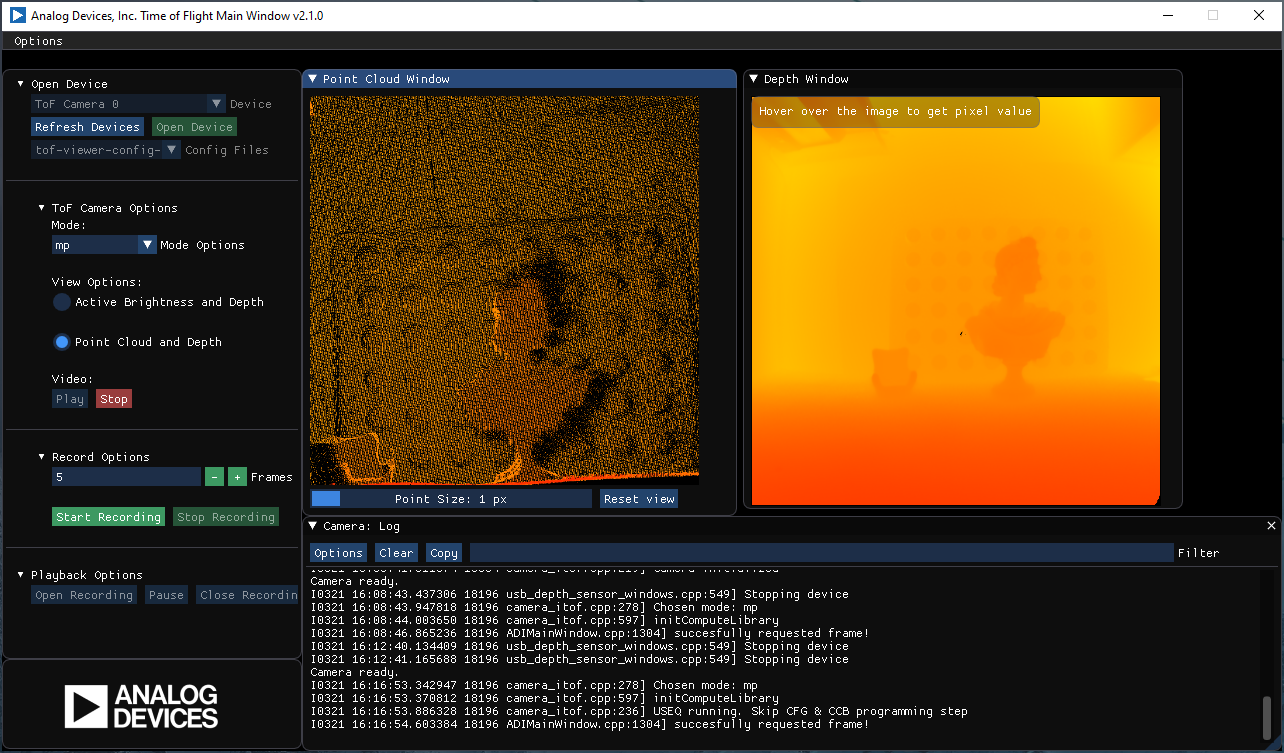
Point Cloud and Depth
- If camera is already running 'Active Brightness and Depth' viewer:
- Click 'Stop'
- Select 'Point Cloud and Depth'
- Click 'Play'
- If this option is selected, the first window will show a point-cloud generated from the depth on the second window.
- Point Cloud Controls:
- Zoom In/Out
- Use the mouse wheel and scroll forward to zoom in, scroll backwards to zoom out.
- Grab image and move it in all directions
- Hover over the Point Cloud Image and and drag the mouse while the right mouse button is pressed. Move slowly
- Rotate image
- Drage the mouse while pressing the left mouse button
- Increase / Decrease Point Cloud point size
- Grab the slider at the bottom of the Point Cloud window and move it left or right to decrease or increase the point size.
- Reset View
- Press the “Reset View” button to restore to default image size and position
Recording
- Recording option allows users to save AB, Depth, and PointCloud, and raw frames while viewing the scene
- Select the number of frames to record and click 'Start Recording'
- In the pop-up window select save location and save as FSF format
Playback
- The 'Playback Options' menu allows the user to play recorded data
- Click 'Open Recording' and select the '_XYZ.fsf' file
Troubleshooting
- Visit Troubleshooting Guide
resources/eval/user-guides/eval-adsd3100-nxz-gui.1686066683.txt.gz · Last modified: 06 Jun 2023 17:51 by Harshvardhan Bhatia