


No renderer 'pdf' found for mode 'pdf'
This version (04 Apr 2024 10:16) was approved by Joyce Velasco.The Previously approved version (20 Nov 2023 04:15) is available.
Table of Contents
CN0341 -- Magneto Resistive Linear Position Measurement User Guide (DEPRECATED)
This reference design has been RETIRED or DEPRECATED, which means it is no longer supported nor being sold by Analog Devices. This page is here for historical/reference purposes only.
Overview
This circuit provides a contactless, AMR (Anisotropic Magneto Resistive) linear position measurement solution with an accuracy of 2mil over a 0.5 inch range. The circuit is ideal for applications where high speed, accurate, non-contact length and position measurements are critical. A rotating magnetic field stimulates the sensor, creating an output voltage of ±70mV. The circuit provides an industry leading angle measurement solution suitable valve and flow measuremetns, machine tool speed control, motor speed measurement and other industrial or automotive applications.
General Setup
- One EVAL-CN0341-SDPZ Evaluation Board
- EVAL-SDP-CB1Z Evaluation board
- CN0341 Evaluation Software
- One USB Type-A plug to USB Mini-B plug cable.
- One Neodymium magnet, approximately two inches in length. magnetized along the length of the magnet.
- One of the following:
- 6V DC wallwart. (EVAL-CFTL-6V-PWRZ)
- DC power supply with a 0-6V output. (HP6236B)
Minimum PC/System Requirements
- One PC with the following
- Windows XP SP2, Windows Vista or Windows 7 Business/Enterprise/Ultimate editions
- Intel Pentium processor (x86 compatible), 1GHz or faster
- 512 MB RAM and 2 GB available hard disk space
- .NET 3.5 Framework
How to Install the Evaluation Software
- Extract the files within the file CN0341 SDP Eval Software.zip and open the file setup.exe. It is recommended that you install the CN0341 SDP Evaluation Software to the default directory path C:\Program Files\Analog Devices\CN0341\ and all National Instruments products to C:\Program Files\National Instruments\

- Press “Next”.

- Press “Next”.
- Upon completion of the installation of the CN0341 SDP Eval Software, the installer for the ADI SDP Drivers will execute. Follow the on-screen prompts to install the drivers. It is recommended that you close all other applications before clicking “Next”. This will make it possible to update relevant system files without having to reboot your computer.
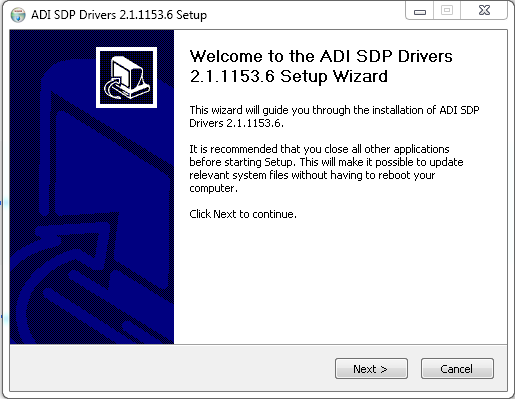
- Press “Next”.

- It is recommended that you install the drivers to the default directory path C:\Program Files\Analog Devices\SDP\Drivers\
- Press “Install” to install the Drivers and complete the installation of all software necessary to evaluate the EVAL-CN0341-SDPZ


Opening and Enabling the Evaluation Software
- Launch the executable found at C:\Program Files\Analog Devices\CN0341 and press the “Connect“ button.


Step by Step Instruction for Calibrating the System
- The following is a step by step guide for calibrating the EVAL-CN0341-SDPZ.
- Calibration requires the user to identify and input the maximum and minimum ADC code for each channel of the ADC. These are found by using a magnet to properly stimulate the sensor and produce a sine or cosine wave on the appropriate sensor output.
- The setup used for testing and collecting data is shown in the image below. A digital caliper accurate to 0.0005” was used to confirm and calculations.
- The distance between the magnet and sensor is measured to be half of the length of the magnet. This allows for optimum accuracy, errors and linearity.
- The magnet slides past the sensor, and in doing so, rotates the magnetic field through the body of the sensor. This stimulates the sensor and produces the sine and cosine outputs required for linear position calculations.
- It is important to note, the entire length of the magnet is not used for calculating position. In this instance, a linear range of +/-0.5 inches was used. Measurements outside of this range produce increasingly bad linearity errors.

- Step 1: Press the 'Click to Sample' button to begin data conversion.
- Step 2: Slide the magnet past the sensor and observe the changing ADC codes.
- Step 3: Input the maximum and minimum codes (seen in step 2) in the boxes provided.
- The calibration coefficients can be modified to produce a better end result. For example, if one of the maximum ADC codes is mis-represented on the high side, the output position will never reach full scale or minimum scale depending on the channel.
- Once the calibration is complete, proceed to the second tab 'Linear Position' to observe the linear position information.


Error Sources, Common Pitfalls and Things to be Weary of
- There a several things to be weary of when setting up and testing a magneto-resistive based linear position measurement system. Each one of the following items can drastically increase the output error of the system and the linearity to a point where accurate calculations of position become quite challenging.
- Vertical Mis-alignment:
- The image below shows the correct position of the sensor with respect to the magnet. The errors introduced by mis-aligning the sensor and magnet vertically. This test consists of moving the PCB up or down by 0.25 inch and 0.5 inch before collecting data. For a measurement range of 1.0 inch, moving the 0.25 inch up or down seriously degrades the performance, adding several mils of error to the calculation. Moving the sensor 0.5 inch up or down makes matters worse, adding tens of mils of error to the original reading

- Rotational Mis-alignment:
- The image below shows a second common error source, rotational misalignment. While the sensor and magnet are positioned ideally with respect to the vertical, the sensor is not parallel to the face of the magnet. Again, several mils of error are added to the calculation depending on the severity of the rotation.

- The image below displays one last common error source, sensor-to-magnet distance. The ideal distance between the sensor and magnet is half of the magnet length. Increasing or decreasing this distance introduces errors into the measurement.


Registration
Receive software update notifications, documentation updates, view the latest videos, and more when you register your hardware. Register to receive all these great benefits and more!
resources/eval/user-guides/circuits-from-the-lab/cn0341.txt · Last modified: 04 Apr 2024 10:16 by Joyce Velasco