Wiki

This version (30 Jul 2021 07:26) was approved by Victor Calinao, Jr.The Previously approved version (03 Jan 2021 21:56) is available.Diff

CN0254 Evaluation Board Guide

Overview

CN0254 is a cost effective, highly integrated 16-bit, 250 kSPS, 8-channel data acquisition system that can digitize ±10 V industrial level signals. The circuit also provides 2500 V rms isolation between the measurement circuit and the host controller, and the entire circuit is powered from a single isolated PWM controlled 5 V supply.

The AD7689 16-bit, 8-channel, 250 kSPS PulSAR ADC contains all the necessary components for the multichannel low power data acquisition system. It includes a 16-bit SAR ADC, an 8-channel low crosstalk multiplexer, a low drift reference and buffer, a temperature sensor, a selectable one-pole filter, and a channel sequencer. The sequencer is useful for continuously scanning channels, and a microcontroller or FPGA is not required to control channel switching.

The AD8605 and AD8608 are low cost single and quad rail-to-rail input and output CMOS amplifiers. The AD8608 inverts, level shifts, and attenuates the ±10 V input signal so that it matches the input range of the ADC, which is 0 V to +4.096 V when using a +4.096 V reference and a +5 V single supply. The AD8605 acts as an external reference buffer to provide sufficient driving ability for level shifting. Both feature very low offset voltage, low input voltage and current noise, and wide signal bandwidth, therefore making them good choices for a wide variety of applications.

The ADuM3471 is a quad-channel digital isolator with an integrated PWM controller and transformer driver for an isolated dc-to-dc converter. It provides the isolated 5 V, 2 W power for the circuit as well as isolates the digital signals at the SPI interface.

The EVAL-CN0254-SDPZ board connects to ADI’s System Demonstration Platform (SDP) and is powered by a 6 V power supply.


Required Equipment


General Setup

Block assignments


  • The EVAL-CN0254-SDPZ (CN-0254 Board) connects to the EVAL-SDP-CB1Z (SDP-B Board) via the 120-Pin connector
  • The EVAL-SDP-CB1Z (SDP-B Board) connects to the PC via the USB cable.
  • Terminal block CN2 is the +6 V power supply input
  • Terminal block J2 is for the multiple channels analog input
  • Jumper J3 is the test point for SPI data lines


Test setup


  1. Connect the 120-pin connector on the EVAL-CN0254-SDPZ Evaluation Board to the connector marked “CON A” on the EVAL-SDP-CB1Z evaluation (SDP) board
  2. After setting the dc output supply to 6 V output, turn the supply off
  3. With power to the supply off, connect 6 V to CN2
  4. Turn on the power supply and then connect the SDP to the PC by using the USB-to-miniUSB cable


Do not connect the USB cable to the Mini-USB connector on the SDP board before turning on the dc power supply for the EVAL-CN0254-SDPZ


Installing the Evaluation Software

  1. Extract the file CN0254_Evaluation_Software.zip and open the file setup.exe.

    NOTE: It is recommended that you install the CN0254 Evaluation Software to the default directory path C:\Program Files (x86)\Analog Devices\CN0254\ and all National Instruments products to C:\Program Files\National Instruments\

  2. Click Next to view the installation review page


  3. Click Next to start the installation


  4. Upon completion of the installation of the CN-0254 Evaluation Software, the installer for the ADI SDP Drivers will execute.

    NOTE: It is recommended that you close all other applications before clicking “Next”. This will make it possible to update relevant system files without having to reboot your computer.


  5. Press “Next” to set the installation location for the SDP Drivers.

    It is recommended that you install the drivers to the default directory path
    C:\Program Files\Analog Devices\SDP\Drivers


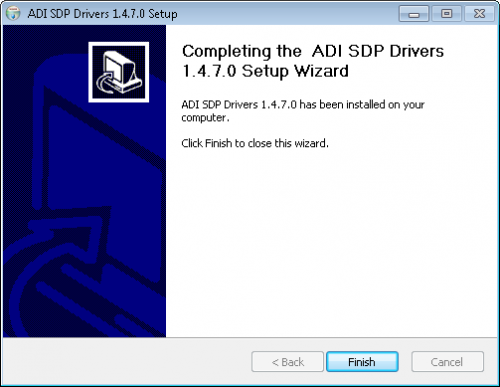
  6. Press “Next” to install the SDP Drivers and complete the installation of all software. Click “Finish” when done.


Using the Evaluation Software

Main Window

  1. Connect Button - Starts the connection between the CN0254 Evaluation Board and SDP-B Controller Board.
  2. Disconnect Button - ends the connection between the CN0254 Evaluation Board and SDP-B Controller Board
  3. Start Button - Start acquisition of measurement data
  4. Save Data - Save the data collected to a tab delimited ASCII spreadsheet file
  5. General control Section
    • Connector - Selects which 120-pin connection of the SDP-B Board to use
    • Input Signal Range - Select range of analog signal input
    • Sample Rate/CH - Set desired sample rate per channel
    • Samples/CH - Set number of samples to be taken per channel
    • Scan mode - Select between single or multiple channel data acquisition
    • Channel Setting for Scan mode - Select which channel/s to be used for data acquisition
    • Capture Mode - Choose between single or continuous capturing of data
    • Bandwidth - Select bandwidth for low-pass filter in ADC that reduces undesirable aliasing effects and limits the noise from the driving circuitry
    • Phase Compensation Checkbox - Compensate unbalanced differential input voltages to the comparator
    • Calibration Checkbox - Turn ON/OFF Calibratration
  6. Multi-Channel Tab
    • Plot options per channel - Edit plot display and options like interpolation and color of output waveform
    • Display Format - Select y-axis of plotted graph between RAW data or voltage
    • Graph Controls - Allow the user to zoon in, zoom out, and pan through the data collected
    • Scale Fit Setting - Allows user to or not to autoscale the output on the graph
  7. Single Channel Tab
    • Time Domain Tab - Shows the acquired measurement data in terms of ADC codes with respect to time
    • Frequency Domain Tab - Plots the FFT of the the ADC samples with the amplitudse in dB of the full scale ADC value
    • Histogram Tab - Plots the number of occurrences of ADC sample values
    • Signal Parameters - Read only. Shows parameters such as SFDR of the signal chosen through the radio buttons on the right side of user interface
  8. Calibration Tab - Contains the calibration instructions for the CN0254 Evaluation Board
    • Precision Voltages - Set the low and high precision voltages to be used for calibration
    • Input Range - Select range of analog signal input
    • Overwrite EEPROM Checkbox - If selected, precision voltage parameter will be saved into EEPROM after calibration is complete
    • Calibrate - Start calibration of the device
    • Recover to Default Value - Recover the original default values of precision voltages of the device from the EEPROM
    • Write Factory Default - Writes precision voltages from calibration to an array in EEPROM and sets them as the factory default values
  9. S/W Version Info Tab
    • Flash LED - Flashes the LED on the SDP controller board
    • Read Firmware - Reads the firmware of CN0254 Evaluation Board


Running the System

  1. Open the CN0254.exe application from the default installation location
  2. Set the correct connector and click the Connect Button
  3. Upon successful connection, calibrate the device in the Calibration tab by following the instructions indicated
  4. After proper calibration, select the desired settings like signal ranges and such
  5. Press the Start button
  6. If you want to save the data to file, press the Save Data button
  7. Click Quit to exit the software


Schematic, PCB Layout, Bill of Materials

EVAL-CN0254-SDPZ Design & Integration Files

  • Schematics
  • PCB Layout
  • Bill of Materials
  • PADS project

Registration

Receive software update notifications, documentation updates, view the latest videos, and more when you register your hardware. Register to receive all these great benefits and more!

End of Document

resources/eval/user-guides/circuits-from-the-lab/cn0254.txt · Last modified: 30 Jul 2021 07:26 by Victor Calinao, Jr