Wiki

This version (18 Jul 2023 04:59) was approved by Angelo Nikko Catapang.The Previously approved version (18 Jul 2023 04:57) is available.Diff

CN0276 Software User Guide

OVERVIEW

CN-0276 is a high performance 10-bit to 16-bit RDC(resolver to digital converter) circuit. The system converts the modulated output of resolver to the digital output. TheAD2S1210 provided integrated solution for accurately measures angular position and velocity with resolver.

In the system AD2S1210 generated programmable excitation signals, the AD8692 and AD8397 compose third order butterworth lowpass filter and power amplifier. The resolver’s excitation signal have two amplitude options, choice by the power supply voltage automatically. The output signals of resolver pass through the third order butterworth lowpass filter made by AD8694 to the AD2S1210 inputs. Both transmit and receive filter set for improve the performance of RDC and filter out the noise to increase EMC characters.

The maximum tracking rate of the RDC is 3125 rps in the 10-bit mode (resolution = 21 arc min) and 156.25 rps in the 16-bit mode (resolution = 19.8 arc sec).

Required Equipment

  • EVAL-SDP-CB1Z Evaluation Board (SDP-B Board)
  • EVAL-CN0276-SDPZ Evaluation Board (CN-0276 Board)
  • Adjustable DC power supplies, output should be satisfied: from +6V to +12V over than 500mA.
  • USB Type-A plug to USB Mini-B plug cable
  • PC with the following
    • Microsoft Windows 7 with sp1 x86 or x64 version, or later
    • Intel Core processor (x86 or x64 compatible), 2GHz or faster
    • At least 4GB RAM and 8GB available hard disk space
    • SDP EEPROM Programmer software
      • Supplied with CD
    • CN0276 Programming File
      • Supplied with CD
    • CN0276 SDP Evaluation Software
      • Supplied with CD

General Setup


Installing the Software

  1. Extract the file CN0276_Evaluation_Software.zip and open the file setup.exe.

    NOTE: It is recommended that you install the CN0276_Evaluation_Software.zip to the default directory path C:\Program Files\Analog Devices\ (in 32-bit operational system) or C:\Program Files (x86)\Analog Devices\ (in 64-bit operational system), and all National Instruments products to C:\Program Files\National Instruments\ (in 32-bit operational system) or C:\Program Files (x86)\National Instruments\ (in 64-bit operational system)


  2. Click Next to view the installation review page


  3. Click Next to start the installation, after the installation, the installer for the ADI SDP Drivers will execute.


  4. Press “Next” to set the installation location for the SDP Drivers.

    It is recommended that you install the drivers to the default directory path
    C:\Program Files\Analog Devices\SDP\DriversR2\ (in 32-bit operational system) or C:\Program Files (x86)\Analog Devices\SDP\DriversR2\ (in 64-bit operational system)

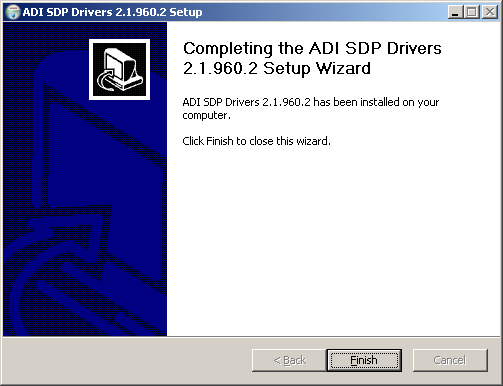


  5. Press “Next” to install the SDP Drivers and complete the installation of all software. Click “Finish” when done.


Connecting the Hardware

  • Connect the TS2620N21E11 (resolver) to J3 of the EVAL-CN0276-SDPZ (CN-0276 Board) as depicted below.

    NOTE: If a different resolver is used other than the TS2620N21E11 from Measurement Specialties, the wiring schematic maybe different!


J3 Pins Signals TS2620N21E11 wire
1 COS Red
2 COSLO Black
3 SINLO Blue
4 SIN Yellow
5 EXC Red/White
6 nEXC Yellow/White
  • Connect the adjustable DC power supplies to the J4 of the EVAL-CN0276-SDPZ (CN-0276 Board) as following table
J4 Pins Types
1 VCC
2 GND

Using the Evaluation Software

Software Control and Indicator Descriptions


  1. Connect/Disconnect Button
    • When this button is clicked, the SDP-B Board USB connection to the CN-0276 Board status will be filliped. A connection to the SDP-B Board must be made to use the software.
  2. Start Button
    • When this button is pressed, the SDP-B Board will collect conversion data and present the acquisitions in the chart.
  3. Stop Button
    • When this button is pressed, the software stop collecting data from the CN-0276 Board.
  4. Samples setting
    • The number which input to this box is use to set the samples for each time the start button pressed.
  5. Run mode setting
    • The check box set the persistent running mode of RDC samples.
  6. Control Tabs
    • Data Analyze This Tab showing the acquired data analyzed result in histogram.
    • RDC Output This Tab include two indicators to showing the position and velocity output of RDC, update in real time when RDC is converting.
    • RDC Configuration This Tab use to write and read the internal register of AD2S1210
    • SDP Information Showing the SDP-B Board information when USB connection available.
  7. SDP Status String Indicator
    • This indicator displays a message to the SDP-B Board.
  8. RDC working Status LED
    • This LED showing the RDC working status, when RDC is converting this LED will be light up, otherwise it will be turn off.
  9. Position indicator
    • This indicator display the RDC position output in hexadecimal.
  10. Velocity indicator
    • This indicator display the RDC velocity output in rps(revolutions per second).
  11. Configuration write to AD2S1210
    • These values will be write to the AD2S1210's register, when Write Configuration Button has been pressed.
  12. AD2S1210 register value
    • These values is the read back of the AD2S1210's register.
  13. AD2S1210 Fault LED
    • These LED showing the fault status of AD2S1210.
  14. Write Configuration Button
    • When this button is pressed, the values on the configuration area will write to the AD2S1210's register.

  1. Follow the instructions to properly install the software and connect the hardware as described in the previous sections.
  2. Open the file named CN0276.exe in the installation directory.

    NOTE: If the software was installed to the default location it will be found at
    C:\Program Files\Analog Devices\CN0276\CN0276.exe (in 32-bit operational system) or C:\Program Files (x86)\Analog Devices\CN0276\CN0276.exe (in 64-bit operational system)


  3. Click the Connect Button. A window with a progress bar will load.


  4. Upon success, the System Status String Indicator will display SDP Board serial number

Capturing Data

  1. Establish a USB Connection Link.
  2. Write the configure data to AD2S1210.

    After power on the EVAL-CN0276-SDPZ, User must write the configure data to AD2S1210 before the first running.

  3. Setting the sample times.
  4. Click the Start Button.
  5. when sample times reached the sample times setting or Stop Button has been pressed, the converting will be halt.

Registration

Receive software update notifications, documentation updates, view the latest videos, and more when you register your hardware. Register to receive all these great benefits and more!

resources/eval/user-guides/circuits-from-the-lab/cn0276.txt · Last modified: 18 Jul 2023 04:59 by Angelo Nikko Catapang